

BLOGS
Pipe Repair Clamp Installation Guide: Step by Step
2026-10-28 04:19:34
Pipe Repair Clamp Installation Guide: Step by Step
Most repair clamp failures trace back to installation, not manufacture. The fitting is genuinely simple, and that is its trap, because simple invites carelessness. Torqued evenly onto a clean pipe, a ductile iron clamp will hold rated pressure for decades. Slapped on over mud and pulled up with an impact wrench until something stops moving, it will weep within the week. This guide lays out the procedure the careful way, roughly in the order a crew meets it.
Check the parts before you dig
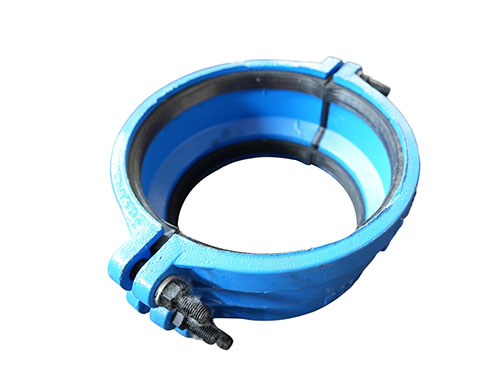
Lay the clamp out on the tailgate first. Confirm the size marking matches the pipe, and verify the actual pipe diameter with a tape, because records on old networks are optimistic. Count the bolts and nuts against the drawing, and check that the gasket is supple and free of cuts or flat spots. If the kit includes a bridging strip, confirm its length suits the damage. Finding a missing washer at the parts stage costs a minute; finding it at the bottom of a trench with water rising costs a lot more.
Prepare the pipe surface
The gasket can only seal what it can touch. Dig back enough to wrap the clamp fully around the pipe, including clearance for the lower half and a hand underneath. Then clean the sealing zone with a wire brush: scale, corrosion nodules, paint runs and adhered mud all have to go. On cast iron with heavy graphitic corrosion, work carefully, since the corroded layer can be soft even when the pipe looks sound. Wipe the area down and check for weld beads or repair wraps left from earlier fixes, which prevent the gasket from seating and need to be at least feathered flat.
Position the clamp over the damage
Bring the lower casting under the pipe first, then lay the gasket over the cleaned zone with the damage centered under the bridging strip if one is used. Where the line is depressurized, mark the pipe with chalk at both ends of the gasket footprint so you can confirm the position has not drifted while closing the halves. On a live line, work with the flow reduced, and expect the rubber to want to lift; an extra pair of hands is worth more here than any tool. Bring the upper half down squarely and start every nut by hand. Cross-threading a bolt under pressure is the kind of mistake that ends installations.
Torque in stages, across the pattern
This is the step that decides everything. Finger-tighten all nuts until the castings just touch the gasket, then work through the torque sequence in stages, typically a third of the final value, then two thirds, then full. Move bolt to bolt across the fitting so the halves close parallel; never run one side down completely before starting the other. The target torque comes from the manufacturer's sheet, and it varies with bolt size, so do not carry the number over from a different clamp. If a calibrated wrench is unavailable, at least keep the effort consistent between bolts by feel and count. Keep going around the pattern until no nut turns at final torque, because gaskets relax as they compress and early bolts go loose.
Test and inspect before backfilling
Restore pressure gradually and watch the gasket lines, the bolt holes and both ends of the clamp. A slight dampness that dries can settle in as the gasket beds; an active dribble means stop, depressurize if possible, and re-torque through the sequence once. If that fails, the likely causes are debris under the rubber, a gasket sitting off its channel, or damage extending past the sealing width. Backfill only after the fitting has held at normal line pressure for a sensible observation period. Trench backfill should place fine material around the fitting first; rocks bearing directly on the casting can score the coating and set up the next corrosion cell.
Documentation and follow-up
Before the crew leaves, record the repair. A few photographs, the clamp size and batch number, installation torque and the date go into the asset system. If the clamp came from a supplier with traceable batch documentation, file that too, since it turns a future inquiry into a five-minute lookup. Schedule a check of the repair during the next routine walk or survey of that run, particularly after the first winter, when ground movement is highest.
Common mistakes, briefly
The short list of things to stop doing: torquing with an unregulated impact wrench, skipping the staged sequence, installing over uncured previous repairs, ignoring the bridging strip, and guessing the pipe size instead of measuring. None of these feels like a mistake at the time. All of them are visible in the excavation a year later, usually at someone else's expense.
References
American Water Works Association, Manual of Water Supply Practices M41: Ductile-Iron Pipe and Fittings, Denver, Colorado.
International Organization for Standardization, ISO 2531: Ductile iron pipes, fittings, accessories and their joints for water pipeline applications, Geneva, Switzerland.
International Organization for Standardization, ISO 4633: Rubber seals, joint rings for water supply, drainage and sewerage pipelines, Geneva, Switzerland.
European Committee for Standardization, EN 545: Ductile iron pipes, fittings, accessories and joints for water pipelines, requirements and test methods, Brussels, Belgium.