

BLOGS
Step-by-Step Pipe Repair Clamp Installation for Leaking Lines
2026-09-28 10:21:23
Step-by-Step Pipe Repair Clamp Installation for Leaking Lines
A pipe repair clamp is only as good as the hands that fit it. We have seen clamps fail not because the product was weak, but because the surface was never cleaned or the bolts were guessed at by feel. The good news is that a careful crew can fit a clamp in well under an hour on an accessible line. What follows is the procedure our factory recommends to contractors and utilities, stripped of theory and focused on the steps that actually decide whether the leak stops.
Step 1: Isolate and Drain the Section
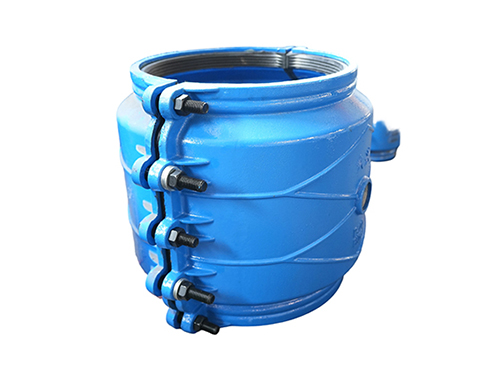
Before touching anything, close the upstream valve and relieve pressure. On a water main this usually means locking out the nearest isolations and opening a downstream drain or hydrant. You cannot seal a line that is still pushing water through the crack, and you certainly should not be standing in a pressurized jet. Confirm zero pressure with a gauge if one is fitted. This single step prevents more injuries than every other part of the job combined.
Step 2: Clean the Pipe Surface
The gasket seals against the pipe, not the rust and scale on top of it. Wire-brush the area for at least two inches beyond the clamp footprint on each side. Loose rust, old wrap, and paint flakes need to come off until you reach sound metal or a stable substrate. You do not need a mirror finish; you need a surface the gasket can bite into. On a badly pitted cast-iron main, a light grind helps the gasket bridge the low spots.
Step 3: Inspect the Damage
Now that you can see it, judge the defect. A hairline crack or a pinhole is ideal for a clamp. A long split or a crushed section may need a repair sleeve instead. Measure the outside diameter with a caliper or a flexible tape, because the nominal size on the drawing may not match the actual OD. Take a photo for the file; a supplier can often confirm the right model from that shot alone.
Step 4: Position the Gasket
Open the clamp shells and lay the gasket into the body, centered over the defect. The gasket should sit flush in its groove with no twists. Some crews lightly tack the gasket with a dab of grease to keep it from shifting while the shell goes on. Make sure the sealing band fully covers the damaged zone with margin on both sides; a gasket that stops short of the crack will simply leak around the edge.
Step 5: Close and Hand-Tighten the Shells
Wrap both half-shells around the pipe and start the bolts by hand. Do not power-wrench them yet. Bring the shells together evenly so the gap on both sides stays roughly equal. If one side closes faster, the gasket will skew and you will chase a leak you built yourself. A second pair of hands here is worth more than a bigger impact wrench.
Step 6: Torque in a Cross Pattern
With the shells snug, switch to a torque wrench and tighten in a crisscross sequence, a little at a time, until you reach the spec the manufacturer printed on the label or the data sheet. Going around in a circle loads one side first and warps the shell. Revisit each bolt once more after the first pass; gaskets compress, and the bolts that felt tight will have loosened a fraction. This patience is the difference between a seal and a seep.
Step 7: Pressure Test Before Backfill
Restore pressure slowly and watch the joint. On a buried line, do not backfill until you have confirmed the seal under working pressure, because digging it back up costs more than the time you saved by skipping the check. Hold pressure for a few minutes and look for weeping at the gasket edges. If a faint drip appears, a small torque increase usually closes it; if it streams, re-open and re-seat the gasket.
Step 8: Document and Move On
Mark the repair on the asset map, note the date, size, and torque, and file the photo. A decade from now someone will thank you when they know exactly what is underground. As a supplier we keep records of every clamp model we ship, so a repeat order is a five-minute email rather than a fresh investigation. Good field repair is half wrench work and half paperwork, and skipping the second half is how lines get forgotten until they fail again.
Common Mistakes to Avoid
Two errors cause most clamp leaks. The first is skipping the clean, so the gasket seats on scale and weeps within a month. The second is torquing in a circle rather than a cross pattern, which warps the shell and opens one edge. Over-tightening is the quieter mistake: it can crush the gasket and shorten its life. Steady, even torque to the printed spec beats brute force, and it is the habit that separates a seal from a seep when nobody is watching the joint.
References
American Water Works Association (AWWA). Manual of Water Supply Practices, distribution system maintenance.
ASTM International. ASTM F1476, Specification for Performance of Gasketed Mechanical Couplings.
U.S. Environmental Protection Agency. Distribution System Repair and Replacement guidance.
Wikipedia contributors. "Water hammer." Wikipedia, The Free Encyclopedia.